Celeriac
Apium graveolens var. rapaceum
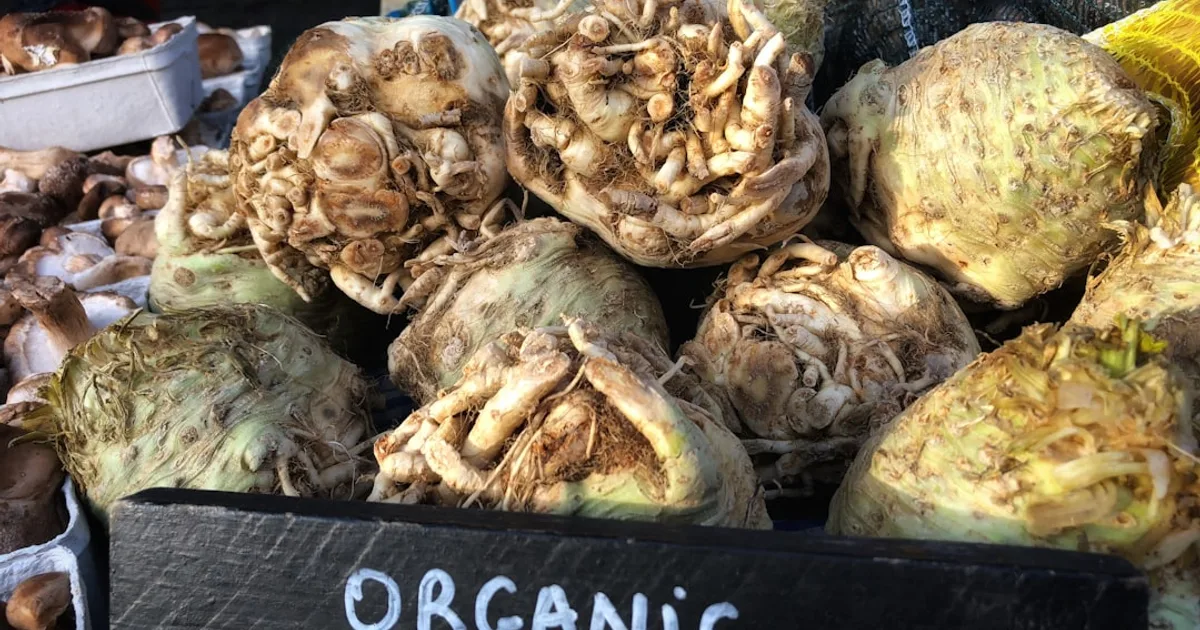
Celeriac (Apium graveolens var. rapaceum) is the same species as stalk celery, but the edible part is a knobby, swollen root base rather than the stems. The flavor is celery-like but earthier and less sharp, and the texture is dense enough to roast, puree, or eat raw in thin slices. It’s a standard root vegetable across northern and central Europe; in the US it shows up at specialty grocers and farmers markets but rarely makes it to conventional produce aisles. That scarcity is most of the ROI argument.
The tops - the celery-like stalks that emerge above ground - are edible and strongly flavored, useful for stocks and soups, but the plant is grown for the root. Don’t mistake a large celeriac plant with lush tops for a successful crop. The part you want is underground.
What you’re actually growing
The celeriac root is technically a hypocotyl - the swollen base of the stem at the soil surface, not a true taproot. It looks more like a large, rough-skinned turnip than a carrot. The knobs and pits on the surface develop where secondary growing points form. Trimming these flat after harvest reveals smooth, cream-colored flesh underneath.
‘Brilliant’ and ‘Diamant’ are the standard commercial varieties and perform well in most climates. ‘Monarch’ has smoother skin that’s easier to peel. ‘Prinz’ is a German variety with consistently high yields in trial plots. For most home growers, variety selection matters less than timing and consistent water management.
Why celeriac, not celery
This is the comparison most gardeners skip, and it’s worth making directly. Celeriac and celery are the same species. You get the same flavor. But the growing experience is different, and for most home gardeners celeriac is the better choice.
| Trait | Celery | Celeriac |
|---|---|---|
| Water requirement | 1.5-2 inches/week, non-negotiable | 1-1.5 inches/week, more tolerant of brief dry spells |
| Heat tolerance | Poor - bolts and turns bitter above 85°F | Better - root development continues through moderate heat |
| Blanching requirement | Yes, to reduce bitterness (mound soil or wrap stalks) | None |
| Harvest window | Narrow - must cut before it bolts | Wide - roots hold in ground through light frosts |
| Storage duration | 2-3 weeks refrigerated | 3-6 months at 33-36°F |
| Pest/disease pressure | High - leaf blight, aphids, carrot fly | Moderate - same threats, less acute |
| Grocery availability | Available year-round | Scarce outside specialty markets |
| Retail price (USDA AMS, 2023) | $1.50-2.50/bunch | $2-4/lb |
Celery’s reputation as a difficult crop comes from that water requirement. Miss a week in July and you get pithy, bitter stalks. Celeriac is more forgiving. You’re also not fighting blanching, which with celery means either mounding soil against the stalks or wrapping them for two to three weeks before harvest to prevent bitterness. Celeriac skips all of that. The root develops underground and is ready when it’s ready.
The storage gap is the real difference. Two to three weeks of celery in the fridge versus six months of celeriac in a root cellar or cold garage. One harvest of celeriac can carry you through March.
The ROI case
A $2.49 packet of celeriac seed is enough to plant a 25-foot row. At final spacing of 6-8 inches, that row holds 37-50 plants. A well-grown celeriac root at 110-120 days weighs 1 to 1.5 lbs - sometimes more in a long cool season. Call it 1 lb average for a realistic yield estimate.
Working the math conservatively: 6-8 roots from a modest planting produces 6-8 lbs gross. At $2-4/lb retail (USDA AMS Specialty Crop Market News, 2023), that’s $12-32 in grocery value from a $2.49 packet. The packet pays for itself after two or three roots. Everything past that is essentially free produce.
More important than the per-pound math is the availability factor. If celeriac isn’t in your garden, finding it requires a specialty grocer, a farmers market, or skipping it entirely. In most of the US, your nearest conventional grocery store doesn’t carry it. Growing it means you have it when you want it. Not growing it means you almost certainly don’t.
Celeriac also stores in a way that multiplies its value over time. Roasted, pureed, eaten raw in remoulade - you’re cooking from it in October, November, December, January, and February off a single summer planting. The effective cost per meal drops with every month it sits in cold storage.
Starting indoors - the step you cannot skip
Celeriac has a long season: 110-120 days from transplant to harvest. In most of the continental US, that means you cannot direct sow and expect a decent root before frost. You have to start indoors.
Start seeds 10-12 weeks before your transplant date. For Zone 5-6, that means starting in late January or early February for an April transplant. For Zone 7, late February to mid-March for a May transplant.
Germination is slow and irregular. Expect 14-21 days at 65-70°F. Some seeds will come up at day 10, some at day 18. This is normal. The keys:
- Surface sow only. Celeriac seeds need light to germinate. Press them gently into the surface of damp seed-starting mix; do not cover them.
- Keep the surface consistently moist. A plastic dome or plastic wrap over the flat helps until the first seedlings emerge. Dry-out between waterings is the most common reason celeriac fails to germinate.
- Bottom heat helps. A heat mat set to 70°F speeds germination by several days compared to ambient room temperature.
Once seedlings emerge, move them to bright light immediately. Celeriac seedlings are spindly and will etiolate fast on a windowsill. A grow light 3-4 inches above the tray works better. Thin to one per cell at the 2-3 true leaf stage.
Harden off transplants for 7-10 days before setting them out. Celeriac transplants look fragile, and they are. Don’t rush them.
Soil, spacing, and early season
Soil pH 6.0-7.0. Rich, moisture-retentive loamy soil produces the best roots. Sandy soil produces small, misshapen roots. Compacted soil produces the same. Work in 4 inches of finished compost before transplanting and you’ll address both problems at once.
Transplant spacing: 6-8 inches in rows 18 inches apart. Closer spacing produces more roots per square foot at the cost of individual root size. If you’re growing for kitchen use rather than maximizing bed output, 8 inches gives you cleaner, larger roots.
Side-dress with a balanced fertilizer (10-10-10) four weeks after transplanting and again at mid-season, around 60 days in. Nitrogen keeps the tops growing; the tops are where the carbohydrates come from that fill out the root.
Mulch the bed to 3 inches after transplanting. Celeriac has shallow roots and is sensitive to soil moisture swings. Mulch buffers temperature and reduces evaporation - both matter for root quality.
Water and the cracking problem
The single most common celeriac failure in home gardens is inconsistent watering. The root cracks. It’s not a disease; it’s a response to irregular moisture - the root grows fast when water is available after a dry spell and the cell walls can’t keep up. Cracked roots aren’t inedible, but they’re harder to store and more susceptible to rot.
Aim for 1-1.5 inches per week. In hot dry periods that may mean watering twice a week. Drip irrigation or soaker hoses work better than overhead watering because they deliver moisture directly to the root zone without wetting foliage, which reduces disease pressure.
You’ll notice celeriac is more tolerant than celery, but “more tolerant” doesn’t mean drought-tolerant. Don’t let the bed go dry for more than a few days during root swell in late summer.
Earthing up - the technique most guides skip
As the root swells and the crown rises above soil level, you need to do something about the exposed upper root. Left alone, it develops unevenly, with a wider, flatter profile and more secondary growths on the exposed surface. Here’s what to do instead.
Starting around 60-70 days in, begin removing the side shoots that emerge around the base of the crown. These are small green shoots that cluster around the bottom of the stem. Pull or snap them off cleanly. Then remove the outer two or three leaf stalks - the oldest, most outward-facing ones - by snapping them off at the base.
This does two things. It exposes the upper crown to air, which encourages the root to develop upward and round rather than spreading laterally. It also directs the plant’s energy away from producing more foliage and into the root itself.
Do not hill soil up over the crown. That’s blanching, and it’s the celery technique. With celeriac, you want the crown visible and aired out. What you’re removing is the extra vegetative growth that competes with root development. Repeat this process every two to three weeks through mid-season. By harvest, your plant should look a bit bare at the base, with the round crown sitting at or just above soil level, and a clean set of central leaves above it.
This technique is documented in vegetable production research from Wageningen University in the Netherlands, where celeriac is a commercial crop. The side shoot removal consistently improves root shape and reduces surface knobbing.
What goes wrong
Septoria leaf blight (Septoria apiicola) is the same disease that affects stalk celery - tan spots with darker borders that spread in wet, warm weather. It defoliates plants progressively and weakens root development if severe. Apply copper-based fungicides preventively in humid climates. Avoid overhead watering. Rotate celeriac to a different bed every three years.
Carrot fly (Psila rosae) larvae tunnel into the root in mid to late summer, creating orange-brown channels that become entry points for rot. Row covers installed immediately after transplanting prevent egg-laying females from reaching the plants. Remove covers only for weeding and inspection, then replace them. Beneficial nematodes (Steinernema feltiae) applied to the soil at label rate in late spring can reduce larval populations.
Crown rot from overwatering or poor drainage causes the root to soften at the base. There’s no recovery. Pull affected plants, improve drainage before replanting, and don’t plant celeriac in the same spot the following year.
Pithy centers in large roots are a sign the root grew too fast or stayed in the ground past its prime. Roots over 4-5 inches in diameter are at higher risk. Harvest when roots reach 3-4 inches across and don’t wait for them to get bigger.
Harvest
Harvest when roots are 3-4 inches in diameter, which typically falls at 110-120 days from transplant. In mild climates (Zone 6 and warmer), celeriac can stay in the ground through fall frosts. Light frost improves flavor - the root converts some starch to sugar in response to cold, which deepens the flavor. In Zone 5 and colder, harvest before the ground freezes.
Lift roots with a garden fork, working around the perimeter to avoid cutting the root. Trim the tops to 1 inch and cut off the lateral roots and any secondary knobs that snap off cleanly. Leave the main root body intact. Brush off loose soil. Don’t wash the roots before storage.
Let harvested roots cure for two to three days in a cool, dry location before putting them into long-term storage. This toughens the skin and helps seal any minor cuts.
Storage
Celeriac stores at 33-36°F with high humidity - 90-95% relative humidity is the target. A root cellar is ideal. An unheated garage that stays above freezing works. A refrigerator crisper drawer works for smaller quantities.
For root cellar storage, pack roots in barely damp sand, sawdust, or peat moss. For refrigerator storage, place each root in a plastic bag with a damp paper towel and seal loosely. The goal is to prevent the surface from drying out without creating standing moisture that promotes rot.
Under these conditions, celeriac holds 3-6 months without quality loss (Cornell Cooperative Extension, Root Vegetable Storage, 2020). Check stored roots every few weeks and remove any that show soft spots. One rotting root will spread to neighbors if left in contact.
In the kitchen
Raw celeriac goes into remoulade - julienned thin and dressed with a mustard mayonnaise. It’s the classic French preparation and it holds for two to three days in the refrigerator, which makes it a practical make-ahead side. The julienning takes time; a mandoline with a julienne blade speeds the process.
Roasted whole at 400°F for 60-75 minutes, celeriac develops a dense, slightly caramelized interior. Rub the outside with oil, wrap loosely in foil for the first 45 minutes, then uncover to finish browning. Slice and serve as you would roasted beet.
Pureed with potato it becomes a lighter, more interesting alternative to straight mashed potatoes. A 50/50 ratio of celeriac to starchy potato (Russet or Yukon Gold) gives you the celery flavor without the gluey texture that all-celeriac puree can develop. Finish with butter, cream, and white pepper.
The tops are aggressive in flavor - too strong to eat raw. Use them in stock the way you’d use celery. They’re worth keeping in a bag in the freezer.
Related crops: Celery, Parsnip
Related reading: Beginner Homestead Crops - which root vegetables earn a place in a first-year homestead garden
Growing Celeriac? Track your harvest value and break-even date in the Garden ROI app.
Get the App