Garlic
Allium sativum
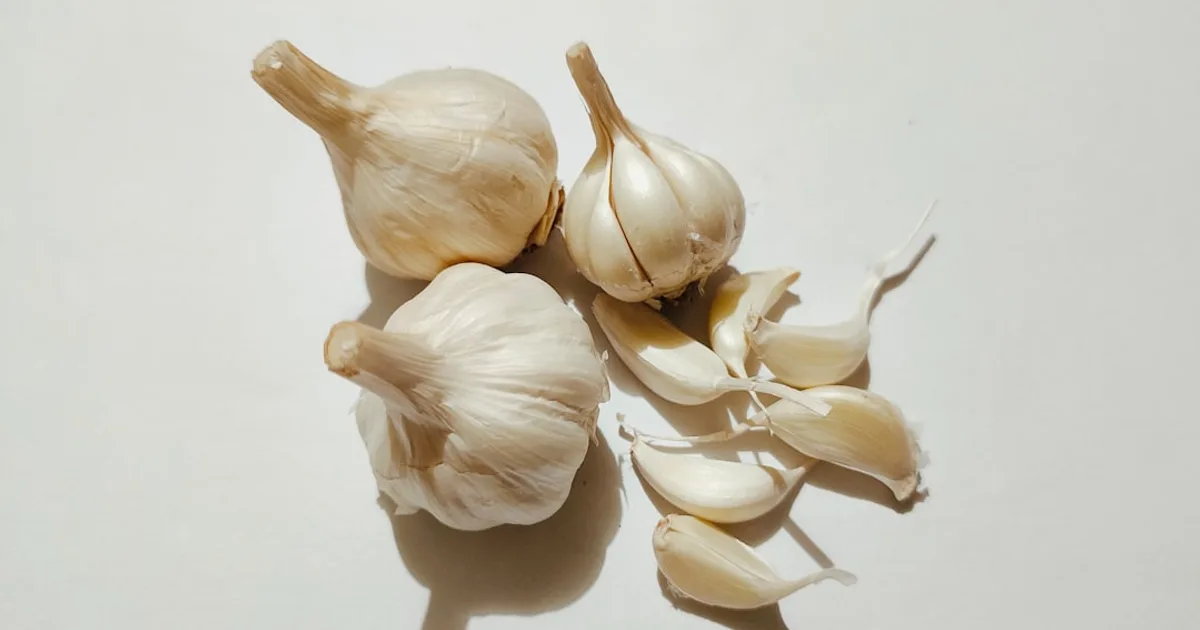
Garlic (Allium sativum) is one of the better-argued cases for growing your own food. The garlic sold in most grocery stores is Chinese-grown softneck that was harvested months ago, fumigated for import, and sometimes irradiated to prevent sprouting (USDA APHIS import treatment requirements). The hardneck garlic you grow at home is fresh-cured, unirradiated, and so different in flavor from the imported commodity that comparing them is like comparing a ripe backyard tomato to a February grocery store tomato. You grow it in fall and harvest it the following summer, which means the crop occupies bed space through winter when there’s nothing else going in those beds anyway.
The full ROI analysis for garlic, including year-over-year cost modeling, is at Garlic ROI Analysis. This page covers everything you need to grow it well.
Hardneck vs. softneck: two different plants in practice
Hardneck garlic (A. sativum var. ophioscorodon) produces a stiff central flower stalk called a scape and has 4 to 12 cloves arranged around that stalk, often in a single layer. The cloves are larger and easier to peel than softneck. It has more complex flavor and stores for 6-9 months under good conditions. Hardneck types need a period of cold vernalization (at least 4-8 weeks below 40°F) to develop proper heads - they perform best in zones 4-8. The main subgroups are Rocambole, Porcelain, Purple Stripe, and Marbled Purple Stripe, each with distinct flavor profiles covered below.
Softneck garlic (A. sativum var. sativum) doesn’t produce a scape, stores 9-12 months, and is the type you find braided in Italian delis. It’s what most grocery stores sell. Softneck tolerates warmer winters better and is more consistent in mild-climate zones (7-10). The flavor is milder and more standardized across heads - it’s reliable for cooking but it’s not what makes garlic growers evangelical about growing their own.
For most home gardeners in zones 4-8: grow hardneck. For zones 9+: softneck or creole types work better.
Hardneck subtype flavor and use comparison
The hardneck category isn’t monolithic. These four subtypes have distinct flavor profiles, clove structure, and storage windows. Which one you plant changes what you can do with your harvest.
| Subtype | Flavor profile | Cloves per head | Storage | Best use |
|---|---|---|---|---|
| Rocambole | Earthy, complex, hot raw, rich when cooked - the connoisseur’s choice | 8-12, loosely wrapped, easy peel | 4-6 months | Raw applications, fresh cooking October-December; eat first |
| Porcelain | Hot raw, assertive, mellows with cooking; most widely grown hardneck | 4-6, large cloves, tight wrapper | 8-12 months | Long-cooked dishes, roasting, general use through spring |
| Purple Stripe | Intense, almost sweet when roasted; pronounced garlic flavor even cooked | 8-12 | 6-8 months | Roasting whole heads, garlic confit, any application where you want forward garlic flavor |
| Marbled Purple Stripe | Similar to Purple Stripe with slightly nuttier profile; most cold-tolerant hardneck | 8-12 | 6-8 months | Roasting, cold-climate gardens (zones 3-5), reliable performer in short seasons |
The practical implication: if you have space for two varieties, plant Rocambole and Porcelain together. Eat the Rocambole through December when it’s at peak flavor, and let the Porcelain carry you into spring. Rocambole sitting in storage past January is declining every week. Porcelain planted at the same time is still in its prime.
Storage comparison: what you can realistically expect
Storage life varies more than most garlic guides admit. The difference between 4 months and 12 months comes down to three things: the variety, the quality of the cure, and your storage conditions.
| Type | Variety examples | Realistic storage (ideal conditions) | Practical notes |
|---|---|---|---|
| Rocambole | Spanish Roja, German Red, Killarney Red | 4-6 months | Flavor peaks early, degrades fast; eat by January |
| Purple Stripe / Marbled | Chesnok Red, Persian Star, Siberian | 6-8 months | Good all-purpose storage hardneck |
| Porcelain | Music, Romanian Red, Georgian Crystal | 8-12 months | The hardneck that stores like a softneck |
| Silverskin (softneck) | Nootka Rose, Idaho Silver | 9-12 months | Commercial standard; good braid candidate |
| Artichoke (softneck) | Inchelium Red, Susanville | 9-12 months | Larger yields per plant than hardneck; milder flavor |
If you want to be buying garlic from your own stash through April and May, grow softneck or Porcelain hardneck. If you want the most interesting garlic you’ve ever cooked with between October and December, grow Rocambole. The mistake is growing Rocambole expecting it to last until spring. It won’t, and you’ll wonder what you did wrong.
Ideal storage conditions for all types: 50-60°F, 45-50% relative humidity, good air circulation. Mesh bags or slatted wooden crates work. Plastic bags are the fastest way to rot a good cure.
Zone-by-zone planting calendar
Garlic is planted in fall, not spring. The timing goal is to get roots established before the ground freezes while keeping the clove from sending up too much top growth before winter. A clove that goes into the ground too early in a warm fall pushes 4-6 inches of green top before frost, which is more vulnerable to winter kill than a clove that just established roots. Too late and you get poor root development before the ground locks up.
The rule of thumb is 4-6 weeks before your average first hard freeze (below 28°F). The table below gives planting windows and expected harvest ranges by USDA hardiness zone (Penn State Extension, Garlic Production for the Gardener, 2020; UC Cooperative Extension, Garlic Production in California, 2019).
| USDA Zone | Planting window | Fall green-up | Scape timing (hardneck) | Expected harvest window | Best type |
|---|---|---|---|---|---|
| Zone 3 | Sept 1 - Sept 20 | Minimal before dormancy | Late June | Late July - early August | Marbled Purple Stripe, Porcelain |
| Zone 4 | Sept 15 - Oct 1 | 1-2 inches before frost | Mid-June | Mid-July - early August | Porcelain, Marbled Purple Stripe |
| Zone 5 | Oct 1 - Oct 15 | 2-4 inches; mulch before hard freeze | Late May - early June | Early July | Hardneck all types; Rocambole performs well |
| Zone 6 | Oct 10 - Oct 25 | 4-6 inches common | Late May - early June | Late June - early July | Hardneck all types |
| Zone 7 | Oct 20 - Nov 10 | 6-8 inches; can overwinter semi-green | Mid-May | Mid-June | Hardneck and softneck; softneck more consistent |
| Zone 8 | Nov 1 - Nov 20 | Stays partially green most of winter | Early-mid May | Early June | Softneck strongly preferred; Creole types; some hardneck |
| Zone 9 | Nov 15 - Dec 1 | Evergreen through winter | N/A (softneck) | May - early June | Softneck (Artichoke, Silverskin); Creole |
| Zone 10 | Dec 1 - Dec 20 | Evergreen | N/A (softneck) | April - May | Softneck only without pre-chilling |
Zone 9-10 growers who want hardneck flavor: buy seed garlic in October, refrigerate the whole heads for 4-6 weeks at 40°F, then plant in late November or early December. The cold treatment simulates the vernalization the plant would normally get in the ground. It works, but softneck is much easier.
Zone 3-4 growers should mulch immediately after planting - 4-6 inches of straw before the ground freezes. The mulch moderates freeze-thaw cycles and prevents frost heaving of newly planted cloves that haven’t had enough time to anchor their roots.
Scape harvest: timing, technique, and what to do with them
Hardneck garlic sends up a coiled flower stalk (the scape) in late spring - typically 4-6 weeks before the heads are ready to pull. In zones 5-6 that’s usually late May through June. The scape emerges from the center of the plant, curls once or twice, and if left alone will eventually straighten, form a bulbil head, and try to reproduce. You don’t want that.
When to cut: Remove the scape when it has completed its first full curl but before it straightens back out. That window is about 7-10 days wide. Cut at the base where the stalk emerges from the top of the foliage, using clean scissors or a knife. Leaving a stub isn’t harmful; cutting into the foliage is.
Why it matters: Penn State Extension research documents a 25-30% increase in final bulb weight when scapes are removed at the correct stage compared to leaving them on (Penn State Extension, Garlic, 2020). That’s the difference between a head weighing 2 oz and one weighing 2.6 oz. Across a 100-plant bed, that’s an extra 3-4 lbs of cured garlic from the same amount of seed and growing time.
Scapes left too long - past the point where they straighten and begin forming the umbel at the tip - return less benefit to the bulb than scapes cut at the curl stage. The plant has already committed some energy to the reproductive effort. Cut them early.
What to do with scapes: They’re a genuine secondary crop, not a pruning byproduct. Figure on roughly 1 lb of scapes per 10-plant row. At farmers markets, scapes sell for $3-6/lb bundled - a market that exists because home cooks figured out they’re useful. On a 100-plant bed, that’s a potential $30-60 in scape value before you’ve pulled a single head.
- Stir-fry: Scapes stir-fry whole in a hot pan with oil and salt, same as asparagus. They need about 5 minutes over high heat to get tender.
- Grilled: Toss with olive oil, salt, and pepper; grill 3-4 minutes per side until lightly charred. Better than asparagus on the grill because they hold together.
- Pickled: Basic brine of 5% acidity white vinegar, 1 tablespoon salt per cup of water, a few peppercorns, a bay leaf. Pack cut scapes into jars and refrigerate 10 days before eating. They keep 3-4 months refrigerated.
- Scape pesto: Roughly chop a dozen scapes, blend with 1/3 cup olive oil, 1/4 cup grated Parmigiano-Reggiano, juice of half a lemon, salt, and pepper until smooth. Sharper than basil pesto, more forward with garlic flavor. Freezes well in ice cube trays and the flavor mellows slightly in the freezer, which is an improvement for some uses.
Don’t skip the scape harvest because you think it’s extra work. It takes 20 minutes across a 100-plant bed and you walk away with a secondary crop.
The ROI case
Seed garlic - bulbs pre-selected for planting quality, certified disease-free - runs $12-$20 per pound from specialty seed suppliers. One pound of seed garlic contains roughly 40-50 individual cloves, each of which grows into one full head. At that rate, your seed cost per plant is $0.25-$0.40. USDA ERS retail data shows conventional garlic averaging $3-$5/lb for grocery store softneck (USDA Economic Research Service, Vegetables and Pulses Yearbook, 2023); domestic hardneck at farmers markets and specialty retailers typically runs $6-$14/lb based on USDA AMS terminal market specialty crop reports. One pound of seed garlic realistically yields 6-8 lbs of dried heads - a 6:1 to 8:1 return by weight.
Year one economics on a 100-plant bed (roughly 50 sq ft at 6-inch spacing):
- Seed cost: 2.5 lbs x $14/lb = $35 (mid-range specialty hardneck)
- Expected yield: 2.5 lbs seed x 7 lbs return = 17.5 lbs cured heads
- Value at $8/lb (conservative hardneck retail): 17.5 x $8 = $140
- Scape value at $4/lb: ~2.5 lbs scapes x $4 = $10
- Total harvest value: $150
- Net return on seed cost alone: $115
That’s before accounting for bed preparation, mulch, or labor. It’s also before accounting for the second-year economics, which is where garlic’s ROI becomes hard to argue with.
Year-two seed-saving: when the math changes completely
The second-year economics are the real argument for garlic. When you harvest in June or July, pull your largest, most well-formed heads and set them aside before the rest go into storage or the kitchen. Save 10-20% of your harvest for replanting in fall.
The steady-state math: Starting from the 100-plant bed example above:
- Year 1 seed cost: $35
- Year 1 yield: 17.5 lbs; set aside 2.5 lbs (14%) for replanting
- Year 2 seed cost: $0
- Year 2 saleable/usable yield: 15 lbs (17.5 lbs minus the 2.5 lbs saved back)
- Year 2 harvest value at $8/lb: $120
- Year 2 net return: $120 (seed cost is zero)
In year two and beyond, you keep 15 lbs for kitchen use and planting, your input cost for the garlic itself is zero, and you still have scapes. The only ongoing costs are mulch (roughly $5-10/year in straw) and whatever fertilizer or compost you’d add regardless of what’s in the bed.
Compared to buying grocery store softneck at $4/lb year over year, 15 lbs of homegrown hardneck represents $120 in value per season from zero seed spend. That’s not hypothetical - it’s the standard outcome for anyone who grows garlic for a few seasons and keeps their best heads for seed.
What to save and how: Select for head size and form. The biggest heads came from the healthiest plants with the strongest root systems - those are the genetics you want to propagate forward. Avoid saving from heads with soft spots, visible disease, or misshapen cloves. Break saved heads into individual cloves the day you plant, just as you would with purchased seed.
The garlic also improves over time in a specific way: it adapts to your soil microbiology, your local rainfall patterns, and your specific microclimate. This is called local adaptation, and it’s documented in allium research - garlic selected from the same plot over multiple generations shows improved establishment rates and more consistent head development compared to stock rotated in annually (USDA ARS, Allium Crop Germplasm Research, 2019). You’re not just saving money. You’re slowly developing a strain of garlic that belongs to your garden.
One hard rule: if you see signs of disease - yellowing that looks like mosaic virus, streaked foliage, or any soft rot at harvest - don’t save from those plants. Don’t put them in the compost either. The only way to lose garlic as a self-sustaining crop is to introduce or perpetuate a pathogen through your saved seed. For more on seed-saving methods that apply across crops, see the seed-saving guide.
Companion planting
Garlic’s companion planting reputation comes primarily from allicin and related sulfur compounds, which the plant produces throughout its growing cycle and releases into the soil through root exudates and decomposing tissue. These compounds have documented antimicrobial and insect-deterrent properties (Journal of Agricultural and Food Chemistry, Waldbauer et al., 2012). That mechanism makes garlic useful as a companion in the right situations - and harmful in a few others.
What garlic deters:
- Aphids: Garlic’s sulfur compounds repel several aphid species. Interplanting garlic near roses or brassicas creates a chemical environment that aphids avoid. The effect is strongest when garlic is close to the target plants - within 12-18 inches. This is folk wisdom with a mechanistic basis, not just anecdote.
- Japanese beetles (Popillia japonica): Garlic sprays and interplanting have shown some deterrent effect in USDA-sponsored trials, though the evidence for interplanting is weaker than for topical sprays. The presence of garlic plants near roses is widely practiced by rose growers specifically for this reason.
- Spider mites: Sulfur compounds deter spider mites on nearby plants; garlic is sometimes grown alongside strawberries for this reason.
What garlic benefits:
- Roses: The combination of aphid deterrence and black spot suppression (garlic’s antifungal compounds affect Diplocarpon rosae at close range) makes roses one of the best-documented garlic companions. Plant garlic cloves 12 inches from rose canes in fall; they’ll come up in spring and grow alongside the roses through early summer.
- Brassicas (cabbage, broccoli, kale): Garlic deters cabbage loopers and aphids that pressure brassicas. Interplanting garlic at the edges of brassica beds or in alternating rows provides season-long protection. See Onion and Shallot for related alliums that work similarly.
- Tomatoes: Some documented benefit for aphid pressure reduction; the companion also works practically because tomatoes and garlic don’t compete for root space at the same soil depth.
- Fruit trees: Garlic planted under the drip line of apple and pear trees has some evidence for reducing apple scab (Venturia inaequalis) incidence, likely through volatile sulfur compounds affecting fungal spore germination.
What to avoid:
- Beans and peas: This is the most important restriction. Garlic’s allicin compounds inhibit the rhizobium bacteria responsible for nitrogen fixation in legume root nodules. Growing garlic near beans or peas reduces legume nitrogen fixation capacity, which reduces yield in both crops and undermines the soil-building purpose of growing legumes in the first place (Rosen and Scow, Chemosphere, 1994). Keep garlic at least 3 feet from beans, peas, and clover.
- Other alliums in the same bed: Not a companion planting issue, but a disease risk - concentrating onions, shallots, and garlic in the same bed increases disease pressure, particularly for white rot (Sclerotium cepivorum), which attacks all alliums. Rotate alliums together as a family group.
- Asparagus: Competition for bed space over many seasons; asparagus is a perennial and garlic’s annual cycle creates soil disturbance that damages asparagus crowns.
Growing requirements
Break heads into individual cloves the day you plant - don’t break them apart in advance as the cloves start drying out. Plant with the pointed end up, 2 inches deep, 6 inches apart, in rows 12 inches apart. That’s the technical guidance; in practice, burying the flat end instead of the pointed end is the most common first-year mistake, and it slows but doesn’t kill establishment.
Soil pH of 6.0-7.0. Garlic is a moderate to heavy feeder. Work in 2-3 inches of compost before planting and add a balanced fertilizer (higher nitrogen, like blood meal or a 10-5-5 granular) in early spring when shoots emerge (Penn State Extension, Garlic, 2020). Stop all fertilization by early June - late nitrogen pushes foliage at the expense of bulb sizing.
Mulch 3-4 inches deep after planting. Straw works well. The mulch moderates soil temperature through winter freeze-thaw cycles, suppresses spring weeds as garlic emerges, and retains moisture through spring. In cold climates, the mulch also prevents frost heaving of newly-planted cloves before they establish.
Watering: 1 inch per week through active spring growth. When the foliage starts to yellow in June, stop. Wet soil during bulb-sizing and curing phases leads to rot. If you’re in a wet climate, pull back irrigation completely by late May and let natural rainfall do what it does.
Troubleshooting
The three most damaging garlic problems are a soilborne fungus with no practical cure once established, a storage rot that proper curing prevents, and a foliar rust that’s mostly cosmetic unless severe. Knowing which one you’re looking at tells you whether you have a management problem or a long-term rotation problem.
| Problem | Organism | Symptoms | Primary cause | Mitigation |
|---|---|---|---|---|
| White rot | Sclerotium cepivorum | Yellowing foliage starting at tips; white cottony fungal growth at bulb base; small black sclerotia embedded in the mycelium | Soilborne; sclerotia persist 20+ years; introduced through infected seed or contaminated soil | Prevention only: certified disease-free seed garlic; no soil movement from infected beds; disinfect tools with 10% bleach solution. No chemical treatment effective once established. Rotate all alliums out of that bed permanently. |
| Fusarium basal rot | Fusarium oxysporum f. sp. cepae | Brown discoloration at basal plate of bulb; roots rotting; plant pulls free easily; pink-white mold visible at base | Soilborne; favors warm, wet conditions; more common in late-planted garlic or garlic harvested late | Harvest promptly when foliage indicates maturity. Avoid injury to bulb base at planting and harvest. Rotate alliums on a 3-4 year cycle. Certified disease-free seed reduces introduction risk. |
| Garlic rust | Puccinia allii | Orange-yellow pustules on leaves, typically starting on lower foliage; severe infections cause leaf dieback but rarely kill the bulb | Fungal; spreads by airborne spores; favors cool, wet spring weather; can spread from nearby infected alliums (wild garlic, leeks) | Remove and destroy infected foliage. Copper fungicides applied at first sign of rust provide some suppression (UC Cooperative Extension, Garlic Rust, 2018). Improve air circulation; avoid overhead irrigation. Mild infections rarely affect final yield. |
| Botrytis neck rot | Botrytis allii | Soft, gray-brown decay at the neck during curing or storage; gray fuzzy mold visible on affected tissue | Poor curing conditions; damaged necks; high humidity storage | Cure at 75-80°F with good ventilation for 4-6 weeks before storage. Discard any head showing soft spots. Don’t store in plastic. |
| Onion thrips | Thrips tabaci | Silver streaking or stippling on foliage; distorted new growth in heavy infestations | Insect feeding; thrips overwinter in plant debris and soil | Spinosad sprays effective; neem oil provides partial control. Reflective mulch early season confuses thrips adults. Remove plant debris promptly after harvest. |
| Allium leaf miner | Phytomyza gymnostoma | Meandering white mines in leaves; larvae may tunnel into stem and bulb causing rotting and entry points for secondary infection | Invasive fly; established in US Northeast as of 2015; two flight periods (spring and fall) | Row cover from planting through early June prevents adult egg-laying. Check extension alerts for regional establishment - expanding its range. |
White rot is the one that should keep you up at night. It’s the only disease on this list that permanently compromises a garden bed for allium growing. Everything else is either manageable in-season or preventable through sound curing and rotation practices.
What goes wrong in the field: the common mistakes
Most garlic failures aren’t disease - they’re cultural mistakes that show up at harvest as small, underdeveloped heads.
Planting too late is the most common. A clove planted after the ground is regularly below 40°F won’t establish sufficient root growth before dormancy, which means it starts spring at a disadvantage. Get it in the ground at the right time for your zone, per the table above.
Skipping the scape on hardneck garlic is the second. If you don’t cut the scape, the plant puts a large share of its late-spring energy into reproductive structures instead of the bulb. You’ll harvest smaller heads than the variety is capable of.
Over-watering in late spring is the third. Once the foliage starts yellowing, the plant is telling you it’s done with water. Continuing to irrigate keeps the soil wet during bulb-sizing and increases rot risk during curing. Stop watering.
Harvesting too early or too late: Too early and the wrappers are still thin and the head isn’t fully sized. Too late and the wrappers have begun to deteriorate in the soil, reducing storage life. Watch the foliage: 50-60% brown leaves, with some green still on the plant, is the target window.
Harvest and storage
Watch the foliage. When roughly 60% of the leaves have browned (typically June in zones 5-6, earlier in warmer zones), it’s time to harvest. Each remaining green leaf corresponds to one wrapper layer on the cured head. Harvesting at 50-60% brown leaves gives you 3-4 wrapper layers and the best storage life. Harvesting too early means small, soft heads; too late means the wrappers fall apart.
Lift bulbs gently with a garden fork rather than pulling - the necks can snap under direct force. Shake off loose soil; don’t wash.
Cure in a single layer or in loose bunches in a warm, dry, well-ventilated space out of direct sun for 4-6 weeks. When the necks are dry and papery and the outermost wrapper crackles, the garlic is fully cured. Trim roots and necks, remove the outermost dirty wrappers, and store in mesh bags or wooden crates in a cool (50-60°F), low-humidity space. Storage life by type is covered in the table above - the short version is that hardneck stores 6-9 months depending on subtype, and softneck stores 9-12 months.
Before you put anything away, set aside your 10-20% for fall replanting. Do that first, while the heads are freshest and it’s easy to identify your best ones. Once a head gets eaten or given away, it’s gone.
Related reading: Garlic ROI Analysis - complete year-over-year cost and return modeling; Seed Saving Guide - how to select, store, and propagate your own planting stock across crops; Raised Bed Break-Even - how to calculate whether your bed investment pays off, using a crop like garlic that takes 9 months to first harvest
Frequently Asked Questions
How much garlic does one plant produce?
Each clove planted produces one bulb at harvest. A pound of seed garlic (40-60 cloves) typically yields 6 to 7 lbs of cured garlic.
How long does garlic take to grow?
Garlic planted in fall matures in 240 to 280 days (8 to 9 months) with harvest in early summer. Spring-planted garlic is possible in some zones but produces smaller bulbs.
Is garlic worth growing at home?
A pound of seed garlic ($12) planted in a 4x4 bed can yield 6-7 lbs, returning $30 or more at grocery rates - a 2.5x return. Premium hardneck varieties at farmers markets fetch $8 to $12/lb.
How do you cure and store garlic?
After harvest, hang or lay garlic in a dry, well-ventilated space for 3 to 6 weeks until the skin is papery. Properly cured softneck garlic keeps up to 12 months at room temperature.
Growing Garlic? Track your harvest value and break-even date in the Garden ROI app.
Get the App