
Peanut
Arachis hypogaea
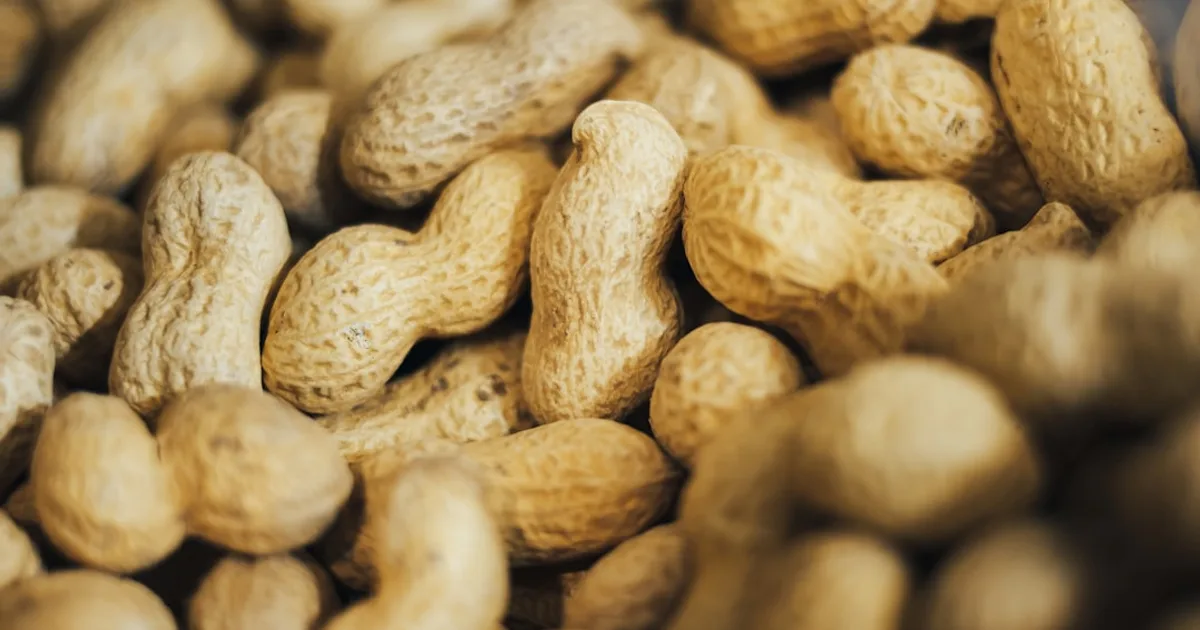
Peanuts don’t grow like any other crop in the garden. After the flowers are pollinated, the plant sends a stem - called a peg - down into the soil, and the peanut pod develops underground at the tip of that peg. The first time you dig up a peanut plant at harvest, it’s strange: what looks like a modest flowering plant has produced a pound of pods buried beneath it.
The novelty is real, but so is the practical case. Peanuts fix atmospheric nitrogen through root nodules, improving the soil for whatever follows in rotation. Freshly harvested and roasted peanuts taste different from commercial peanuts that are months old. Valencia peanuts boiled green within hours of digging are a completely different food from the roasted product. These aren’t marginal differences; they’re the kind of thing that justifies growing a crop that won’t win any yield competitions.
What It Actually Is
Arachis hypogaea is a legume in the family Fabaceae, native to South America. It is the only commonly cultivated plant that produces its fruit underground after aerial pollination - a process called geocarpy. This botanical distinction has direct growing consequences: the soil into which the pegs dive must be loose, friable, and free of rocks or compaction, or pods can’t form properly.
The four market types:
Runner peanuts (A. hypogaea subsp. hypogaea): the type used for most commercial peanut butter production. Low-growing, spreading, 100-120 days. Most widely available seed variety for home gardens.
Virginia peanuts (A. hypogaea subsp. hypogaea): largest seed of any type; the gourmet roasted-in-shell peanut sold at specialty stores. Upright growth, 120-130 days. Better choice when roasting whole is the goal.
Spanish peanuts (A. hypogaea subsp. fastigiata): small, high oil content, used in confections and peanut candy. 100-110 days. More heat-tolerant than other types; suitable for hot, dry conditions.
Valencia peanuts (A. hypogaea subsp. fastigiata): 3-6 seeds per pod (others typically 2-3), sweet flavor, excellent for boiling. 90-110 days. Fastest to mature; the type traditionally boiled green in the American South. Best choice for zone 6 gardens with shorter seasons.
| Type | Days | Seeds per pod | Primary use | Best for |
|---|---|---|---|---|
| Runner | 100-120 | 2-3 | Peanut butter | Zone 7-10, peanut butter production |
| Virginia | 120-130 | 2 | Roasting, snacking | Zone 7-10, gourmet roasting |
| Spanish | 100-110 | 2-3 | Confections, oil | Hot, dry climates |
| Valencia | 90-110 | 3-6 | Boiling, roasting | Zone 6-7 short seasons; boiled peanuts |
For a first planting or a short-season garden, ‘Valencia’ is the most forgiving choice. For serious peanut butter production, Runner types. For roasting whole and eating as a snack, Virginia.
The Peg Formation Process
After a peanut flower is pollinated, a unique reproductive structure develops: the fertilized ovary at the base of the flower elongates into a peg - a rigid, pointed stem 2-4 inches long that bends downward toward the soil by geotropism (responding to gravity). The peg tip penetrates the soil surface and grows downward 1-3 inches, where the peanut pod develops from the peg tip in the dark.
Why this matters for growing:
The peg must be able to enter loose soil. Soil that is crusted, compacted, or rocky blocks the peg from penetrating and no pod forms. This is why:
- Soil must be deeply loosened (12 inches) before planting
- Hilling soil around the base after flowering gives the pegs more loose soil to work with
- Mulching that forms a hard crust under the plant should be avoided
- Raised beds with amended, fluffy soil produce the highest pod counts
Any flower whose peg cannot enter soil simply produces no pod. In compacted soils, you can have a healthy-looking plant with almost no yield because the pegs can’t get in.
When harvesting, you’ll see the pegs still attached - a white-yellow stem running from the root system into the soil, with a pod at the end. Don’t pull by the plant tops; dig under with a fork to lift the entire root ball with pegs and pods intact.
The ROI Case
Raw shelled peanuts retail at $2-4/lb. Dry-roasted peanuts run $4-7/lb. Premium Virginia peanuts roasted in-shell reach $8-12/lb at specialty stores. The home-grown value depends on what you do with them.
A single 10-foot row of peanuts yields 1.0-1.5 lb of shelled peanuts in a good season - modest by weight. The case for growing them is specific preparation value and freshness.
| Scenario | Yield | Value | Seed cost | Net |
|---|---|---|---|---|
| 10 ft row, raw | 1.0-1.5 lb | $3-6 | $1.50 | $1.50-4.50 |
| 10 ft row, home-roasted | 1.0-1.5 lb | $6-10 | $1.50 | $4.50-8.50 |
| 25 ft row, boiled Valencia | 2.5-3.5 lb | $10-18 | $3.00 | $7-15 |
| 25 ft row, peanut butter (Runner) | 2.5-3.5 lb | $15-20 | $3.00 | $12-17 |
Boiled peanut premium: fresh-boiled green peanuts sell for $5-8/lb at roadside stands and farmers markets in the South (zone 7+ regions). The value is in freshness and the preparation - boiled peanuts from commercial operations are made from stored nuts, not green-fresh. Growing Valencia types and boiling within hours of harvest is the only way to get true green peanuts.
Freshness value for roasting: peanuts roasted within days of harvest taste markedly different from commercial peanuts months past harvest. The oils are fresh and the flavor is brighter. If you’ve only eaten commercial peanuts, home-roasted fresh is a genuine difference.
Zone Fit
Zones 8-10: the natural production zone for US commercial peanuts (Georgia, Texas, Virginia, North Carolina). Long, hot summers provide the 110-130 frost-free days without heroic management. Direct sow after soil temperature reaches 65°F (April-May in zone 8); harvest in September-October before first frost. Full production without season extension.
Zones 6-7: practical but requires management. Zone 7 gardens with 130+ frost-free days can grow Virginia and Runner types with direct sowing. Zone 7 with shorter seasons and zone 6: use Valencia types (shortest days to maturity at 90-110 days), start indoors 4-5 weeks before last frost in biodegradable pots to avoid transplant shock, and use row cover at both ends of the season to add 2-3 weeks. In a good zone 6 season, Valencia peanuts complete reliably; in a short or cool season, they may not.
Zone 5: marginal. The 90-day Valencia type in an above-average season with full indoor starts and row cover might complete in a warm zone 5 microclimate. Most zone 5 gardeners report inconsistent results. The main risk isn’t frost at planting - it’s frost at harvest, cutting the season before pod fill completes.
Zone 11+: peanuts grow year-round in tropical conditions but need the seasonal timing of dry weather at harvest for proper curing. In consistently humid tropical conditions, post-harvest curing requires more attention.
Light: peanuts are one of the most light-demanding vegetables in the home garden. 8+ hours of direct sun is non-negotiable for adequate pod development. Partial shade reduces pod fill.
Growing Requirements
Soil: loose, well-drained, slightly acidic (pH 5.8-6.2). Sandy loam is ideal. The pegs that develop after flowering must penetrate the soil to form pods - compacted clay, rocks, and clods interfere directly with pod development. Raised beds with deeply loosened (12-inch) soil work well in clay-heavy regions.
Planting: sow shelled peanuts (raw, not roasted - roasting kills viability) 1-2 inches deep, 6 inches apart, after soil temperature reaches 65°F. In zones 6-7 with short seasons, start 4-5 weeks indoors in biodegradable pots and transplant pot-and-all (peanuts don’t like root disturbance; the biodegradable pot solves this). Direct sow is standard in zones 7-11.
Hilling: when plants are 12 inches tall, hill loose soil around the base of the plant - like hilling potatoes, but for a different reason. The mound of loose soil gives developing pegs more medium to penetrate. Repeat once more 3-4 weeks later when the plant is flowering heavily.
Calcium: peanuts are calcium-sensitive during pod fill. A light application of gypsum (calcium sulfate - 0.5-1 lb per 10-foot row) around the base of plants when they begin to flower corrects calcium deficiency that manifests as empty or hollow pods. Gypsum doesn’t change soil pH, so it’s safe to apply in already-acidic soil.
Inoculation: treat seed with Bradyrhizobium legume inoculant before planting if peanuts haven’t been grown in that soil before. The correct inoculant for peanuts is specific to Arachis - general legume inoculant may not contain the right Bradyrhizobium strain. Inoculated plants develop visible nodules on their roots; un-inoculated plants may show yellowing (nitrogen deficiency) despite being a legume.
What Goes Wrong
Short season failure: the most common problem in zones 5-6. Peanuts need 90-130 days (Valencia) to 130 days (Virginia) of frost-free weather. A late spring frost or early fall frost cuts the season short and produces mostly unfilled pods. Valencia types mature fastest if season length is the constraint.
Hollow pods and unfilled kernels: the most common quality problem. Causes: calcium deficiency during pod fill (apply gypsum at flowering), insufficient soil penetration by pegs (compaction), or very dry conditions during pod fill (maintain consistent moisture July-September).
Southern stem rot (Sclerotium rolfsii): sudden wilting and white mycelial growth at the soil line in warm, humid conditions. A soilborne pathogen that persists for years. Rotate peanuts out of affected beds for 3-4 years. Remove and dispose of affected plants; don’t compost.
Leaf spot (Cercospora arachidicola and Cercosporidium personatum): brown to black spots on leaves causing early defoliation in severe cases. Serious defoliation reduces pod fill. Water at the base, not overhead; remove affected leaves; copper fungicide if pressure is heavy.
Aflatoxin and Proper Curing
Aflatoxin is a mycotoxin produced by Aspergillus flavus and Aspergillus parasiticus molds that grow on peanuts (and some other crops) under warm, humid conditions. Aflatoxin is a potent carcinogen. Commercial peanut production involves testing for aflatoxin at every stage; home growers should understand the food safety implications.
The home grower’s risk is manageable with proper practice:
- Aflatoxin risk is highest in peanuts harvested from hot, drought-stressed plants in hot, humid post-harvest conditions
- Proper curing is the primary prevention. Cure immediately after harvest in a warm (70-90°F), dry, well-ventilated location for 2-4 weeks. Do not let harvested peanuts sit in piles or bags in humid conditions - this is where mold develops
- Discard any pods with visible mold growth, black discoloration inside the pod shell, or shriveled kernels - these indicate potential contamination
- Store cured peanuts in a dry, cool location with good air circulation
- If peanuts smell off or have any musty odor after curing and storage: discard and do not eat
Home-grown peanuts cured properly and stored in dry conditions carry very low aflatoxin risk. The risk is not zero, but it is the same risk category as properly stored commercial peanuts - manageable with attention to drying and storage conditions.
Harvest
Harvest before first frost. The signal for maturity: leaves begin to yellow and the inside of the pod shell shows dark veining and streaking when you split a test pod. The inside of an immature pod shell is white and smooth; a mature pod shows brown-black veining.
Use a garden fork to loosen soil 8-10 inches deep around the plant; lift the entire root ball with pegs and pods still attached. Shake off excess soil. Don’t strip pods in the field - bring up the whole plant.
Green peanuts (Valencia type, for boiling): dig and boil within 24-48 hours of harvest, before any curing. The moisture content is high; the texture when boiled is soft and legume-like.
For roasting or storage: cure first (see Aflatoxin section above). Strip cured pods from the plant after curing is complete.
Preservation
Fresh boiled: green peanuts (freshly dug, uncured Valencia types) must be cooked within 24-48 hours of harvest. They are too moist to store uncured and will mold. Boil immediately and refrigerate cooked boiled peanuts up to 5 days; freeze boiled peanuts up to 6 months.
In-shell cured storage: properly cured in-shell peanuts keep 6-12 months at room temperature in a dry, well-ventilated location; 12-18 months refrigerated; 2 years frozen.
Shelled raw storage: 3-4 months at room temperature; 6-9 months refrigerated; 12+ months frozen. High fat content means they go rancid if stored warm for extended periods. Refrigerate or freeze shelled peanuts.
Roasted in-shell storage: 3-4 months at room temperature in an airtight container; 6 months refrigerated. Roasting accelerates oxidation; roasted peanuts go rancid faster than raw.
Kitchen Applications
Boiled peanuts: the Southern preparation and the one that takes the most advantage of freshness. Fill a large pot with water; add 1 cup salt per gallon and optional spices (Old Bay, cayenne, garlic, bay leaf). Add freshly dug green Valencia peanuts (uncured, still in shell). Bring to a boil, then simmer for 2-4 hours until the kernels are tender throughout - the texture should be like a fully cooked bean. The pods are soft enough to bite open; eat the kernels and discard the shells. Serve warm and eat immediately; the experience is completely different from roasted peanuts.
Fresh home-roasted: spread cured in-shell peanuts on a baking sheet. Roast at 350°F for 20-25 minutes, shaking the pan once halfway through. Remove and let cool before eating - peanuts continue cooking after removal and are better at room temperature than hot from the oven. Salt immediately after roasting while any residual surface moisture is present (this helps salt adhere). The freshness is evident in the flavor - cleaner, brighter, more peanutty than commercial product.
Dry-roasted shelled: shell cured peanuts; spread on a baking sheet; roast at 350°F for 15-18 minutes until lightly golden. The shorter time applies because shells aren’t buffering the heat. Use as snacking peanuts, in trail mix, or as the base for peanut butter.
Peanut butter: dry-roast shelled peanuts (see above), let cool completely, then process in a food processor for 5-10 minutes. Salt to taste during processing. No added oil necessary - the peanuts release enough oil during processing. For natural-style peanut butter, stop when smooth; for denser peanut butter, process less. Fresh peanut butter from homegrown, home-roasted peanuts has a flavor clarity that commercial peanut butter doesn’t match.
Peanut brittle: shelled, roasted peanuts embedded in a hard caramel - cook sugar and corn syrup to 300°F (hard crack stage), stir in peanuts and butter, pour thin on a silicone mat, cool and break into pieces. A classic Americanapplication of peanuts.
Boiled peanut hummus: cooked boiled peanut kernels (from the boiling preparation above) processed with garlic, lemon juice, olive oil, and salt - the same method as chickpea hummus, with a distinctly different flavor. Smoother than chickpea hummus; nuttier; less neutral. An underused application for boiled peanut surplus.
Related crops: Runner Bean - another nitrogen-fixing legume; Chickpea - legume with similar soil improvement value; Sweet Potato - fellow warm-season crop with similar zone requirements
Related reading: Summer Garden Planning - fitting long-season warm-season crops into the planting calendar
Growing Peanut? Track your harvest value and break-even date in the Garden ROI app.
Get the App